Granito vs. Padded Satin Dots

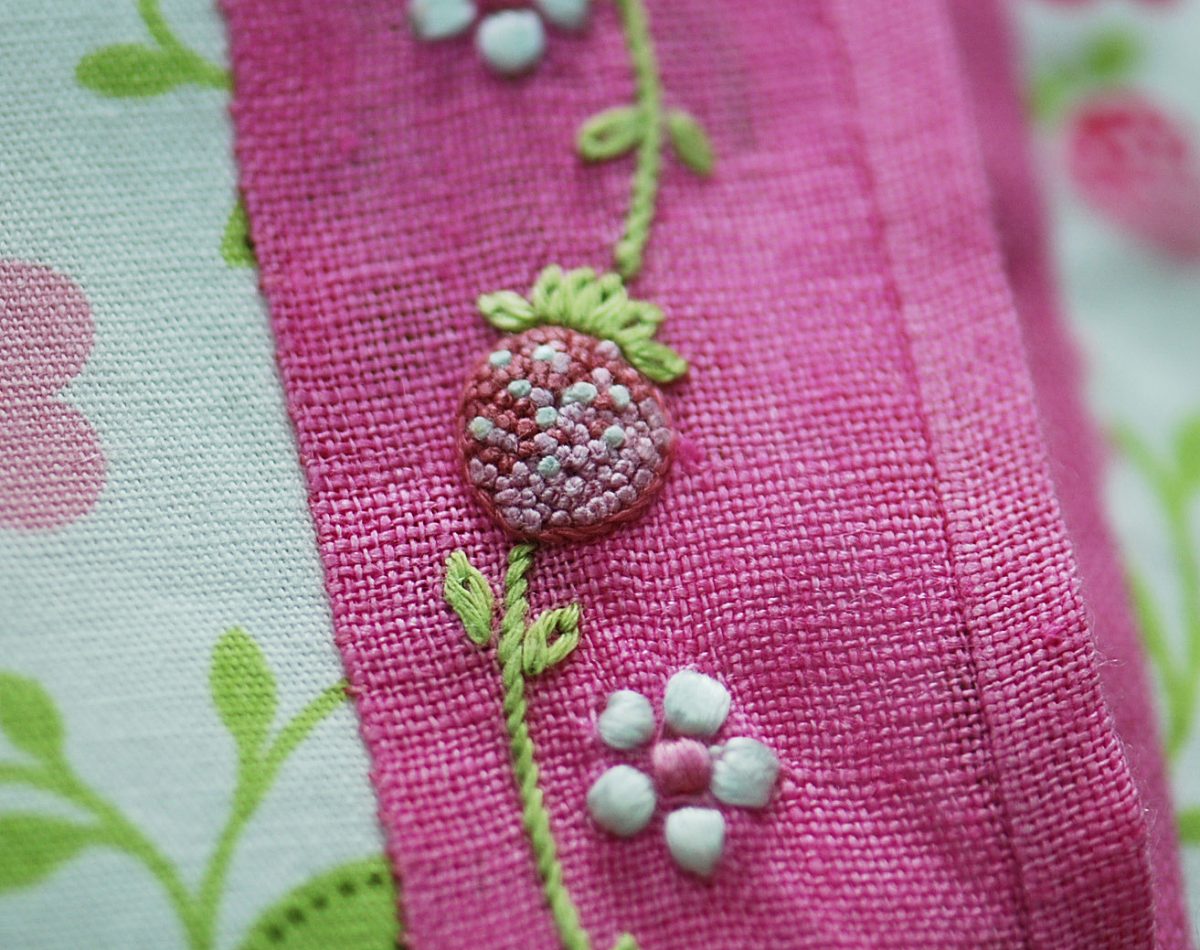
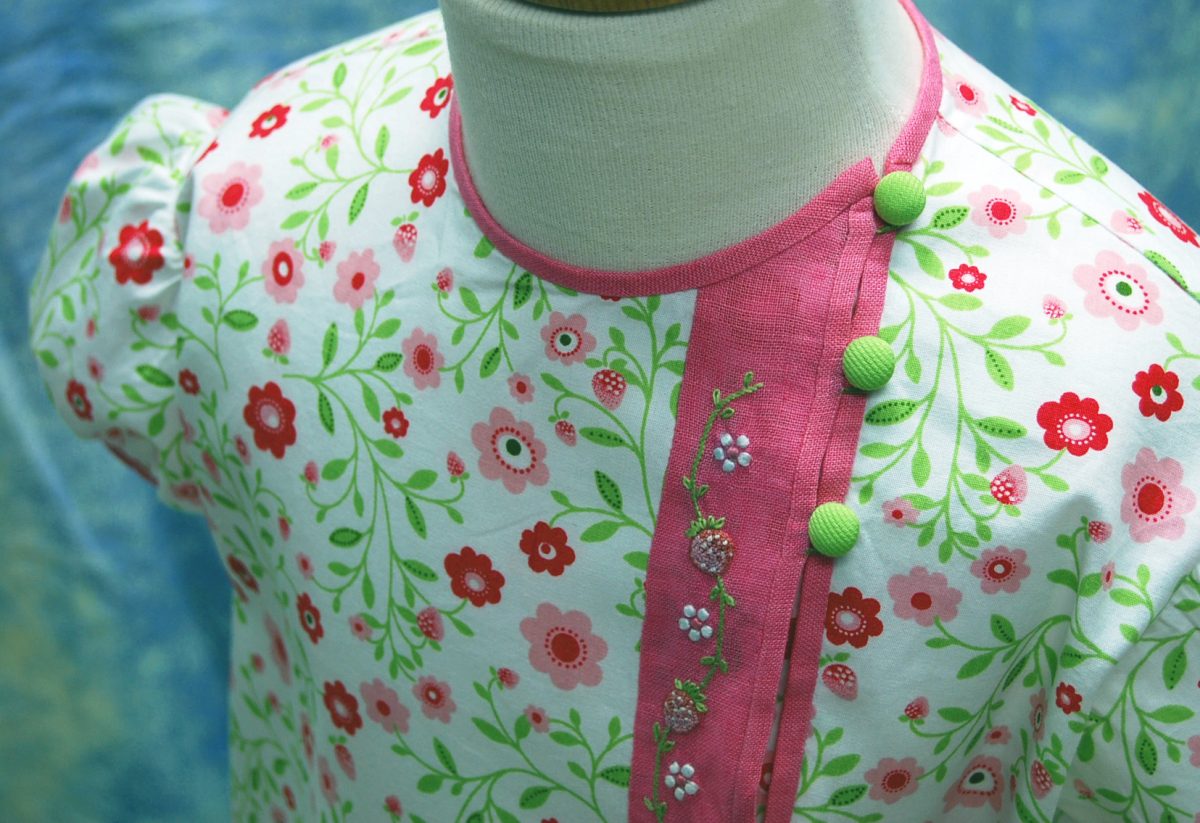
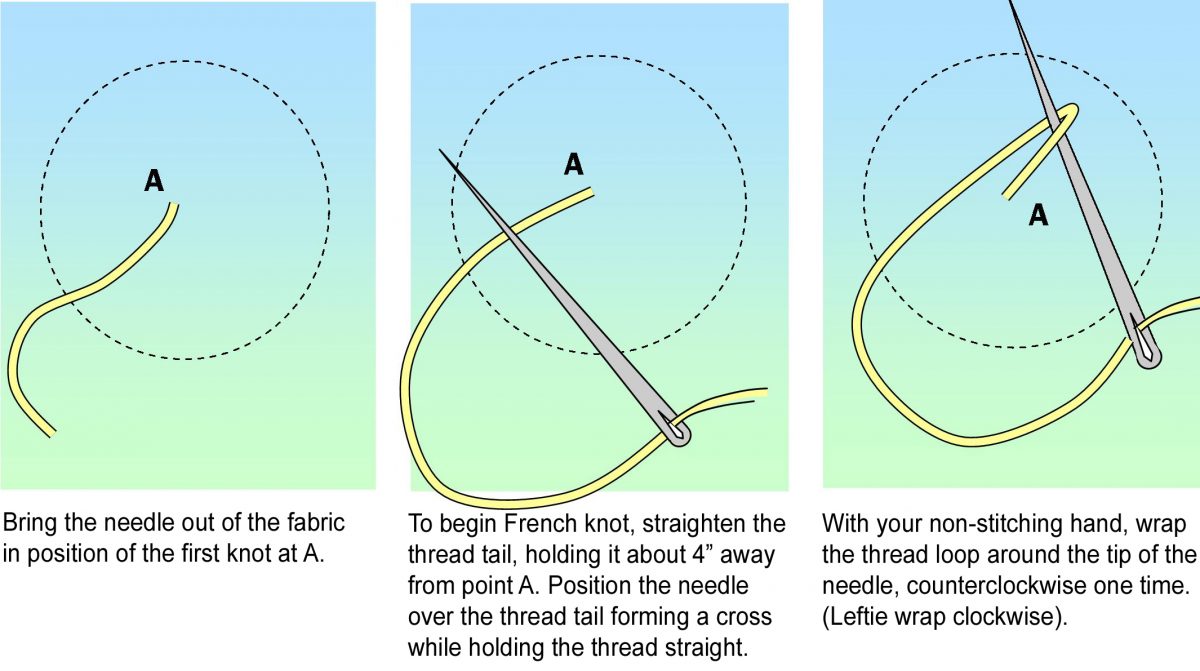
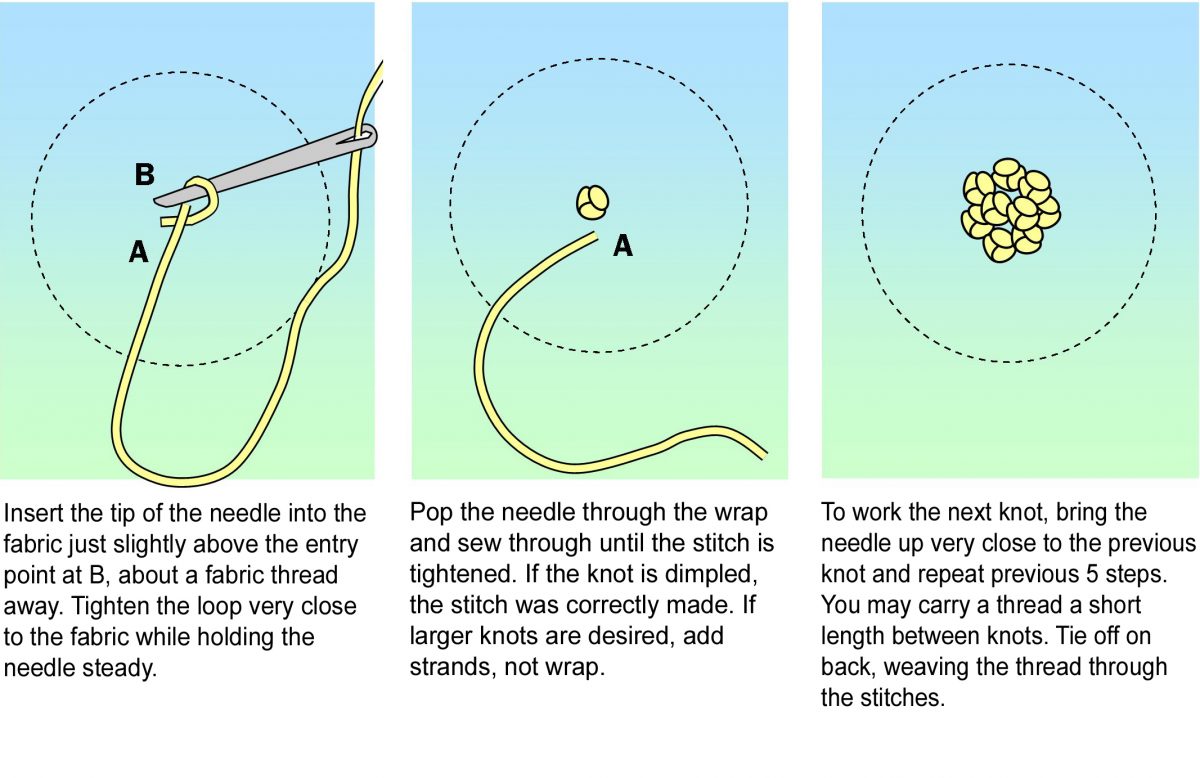
At first glance, Granitos (translated Little Grain), are pearl-like dots stitched in the fabric. The stitch requires no under-padding, but instead, the working thread is mounded continuously until the desired effect is obtained. This consists of only two stitching points, A to B, repeated over and over causing the stitches to mound over until they resemble a small dot in thegranito-flower 
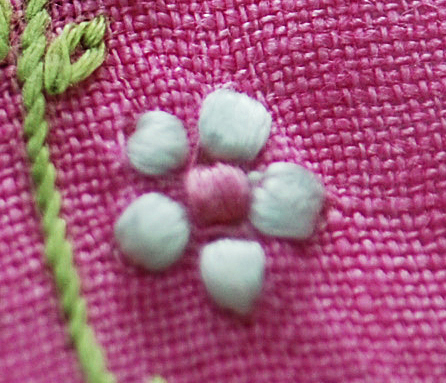
fabric. This is similar to what you may have experienced while machine stitching and the foot of the machine gets stuck in one place, so the stitches keep mounding up. Granitos can be rendered correctly up to a certain size so if a larger dot is required, another technique such as padded dots can achieve the desired effect. I prefer to make my Granitos sans-hoop while working over the finger.

granito-photo-all-steps


Padded satin dots are completely different. The area of the dot is outlined with a very secure foundation stitch such as split-stitch or stem stitch; I prefer the former. The inside of the dot is padded either with “line padding” or chain stitching. Line padding can be layered by alternating stitch directions from one layer to the next, first beginning in the centermost point of the dot and gradually getting wider as the layers are added. The final layer should lay perpendicular to the satin stitches so planning is essential.

padded-satin-dots

It is said that every embroiderer is judged by her skill in making padded satin dots so can be quite challenging to master. It’s easy to go completely wrong while stitching these tricky little round circles, but with a little practice and the correct techniques, you can achieve mastery with a few tidbits of techniques and a lot of practice. Padded dots are best worked in hoop to prevent the dots going oval.

I hope you try both techniques and before you know it, you’ll be including them in your embroidery projects regularly. The accomplishment is enormously rewarding and the effect is absolutely intriguing.

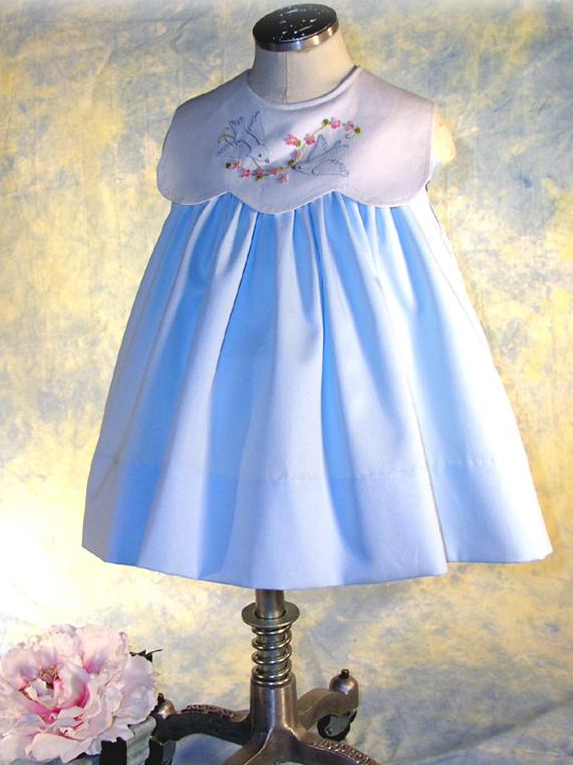
Please check back for additional stitch techniques pertaining to this design. If you would like to purchase a copy of Babes in Blue pattern, please contact me via email: wendschoen@aol.com.

The Easy Way to Attach Tatting

babes-in-blue-collar
This little dress is created using a vintage baby dress from my vast and ever-growing collection of vintage baby clothes. The original was made of broadcloth, as most of the dresses from the 50s, but I chose to make it from linen. The project features Madeira Applique, Granitos, Drawn-thread, Buttonhole scalloped edging, and Satin Dots. I will cover all these stitches in my upcoming posts.

Have you ever wondered how some sewists are able to attach tatting to a garment without having the header showing? I know I did until I figured out how to remove the chain-stitched header entirely.

The technique I’m referring to pertains to tatting that has a chain-stitched header. The very narrow tatting has a thread that trails from one loop to the next. If you cut that header, the tatting will come apart, so choose carefully. If you make your own tatting (jealous me!), just leave the header off. You can often find handmade tatting on ebay and those usually never have a header. Finding vintage well-made tatting is certainly like finding hidden treasure so scoop it up for your stash.

Most of the tatting I use is made in China and it is very good quality and is available in many styles and widths. It is cost effective but only available in white or ecru. Oh how I wish I had learned to tat from my grandmother, who sat on her porch and needle tatted all afternoon while rocking in her favorite chair.

babes-in-blue-handout

babes-in-blue-dress
Babes in Blue is available as a project lesson. The pattern is included in one size only, Size 9-12mo. Please contact me via email if you are interested in purchasing a copy. Email: wendschoen@aol.com

babes-in-blue-header


Shadow Worked Bird with Looped Bullions

If you are at all familiar with my embroidery designs, you’ve probably come to the conclusion that shadow work is my all-time favorite technique. I began working on perfecting my technique of the art sometime in the mid-1990s. The basic love of the technique grew into an obsession which later resulted in the publishing of my fifth book, “Perfecting the Art of Shadow Work,” published by F+W Media.

The project with which I am demonstrating the technique is from my long ago ceased Wendy’s Embroidery Club. Although the Embroidery Club is no longer being published, the individual projects are still available by email request.

Shadow stitching animal shapes can be a bit tricky, but with a little practice, anyone can master it. The little flowers add dimension and enhance the shadow work images.
I usually provide a color key in my project directions to provide a visual of the completed design.

stitching-the-bird


looped-bullion-flower

The dress pattern includes a matching bonnet and features sizes 6 months, 1, 2, and 3.

The featured Embroidery Club project, (Volume 5; Number 1) is available via email to wendschoen@aol.com for $18.00 plus $2.00 shipping. The enclosed pattern includes sizes 6 months, 1, 2, and 3 and is tissue printed. Wendy’s Mastering Shadow Work is only available from Wendy’s Sewing Studio  in limited quantities for $25.00 plus shipping. Please inquire.

French Knot Clusters

I’m often asked about my embroidered French Knot stitched clusters. Sometimes it’s difficult to recognize the stitch due to the fact that I make my stitches using only one thread, usually Floche (a luxury embroidery cotton), and with only one wrap over the needle. I always outline the area to be stitched with short stem stitches in the same color as the knots inside the area. The knots are purposely crammed together with only enough space to allow for the size of the knot. If possible, I avoid placing the knots in an aligned pattern, but instead choosing to place them randomly. The result is almost sculptural and quite interesting.

A very tight closeup of the stitched berry.
The cute baby romper project was featured in Wendy's Embroidery Club. The pattern is only available in Size 2.
The cute baby romper project was featured in Wendy’s Embroidery Club. The pattern is only available in Size 2.
Shoulder detail showing actual size ratio of embroidery to garment.

French Knot Clusters 1

French Knot Clusters 2step 3

French Knot Clusters4
If you are interested in obtaining a pattern for this project, please contact me at wendschoen@aol.com. The complete pattern and detailed handout costs $20 including shipping. Please reference Embroidery Club, Volume 7, Number 1, Passion Posies.