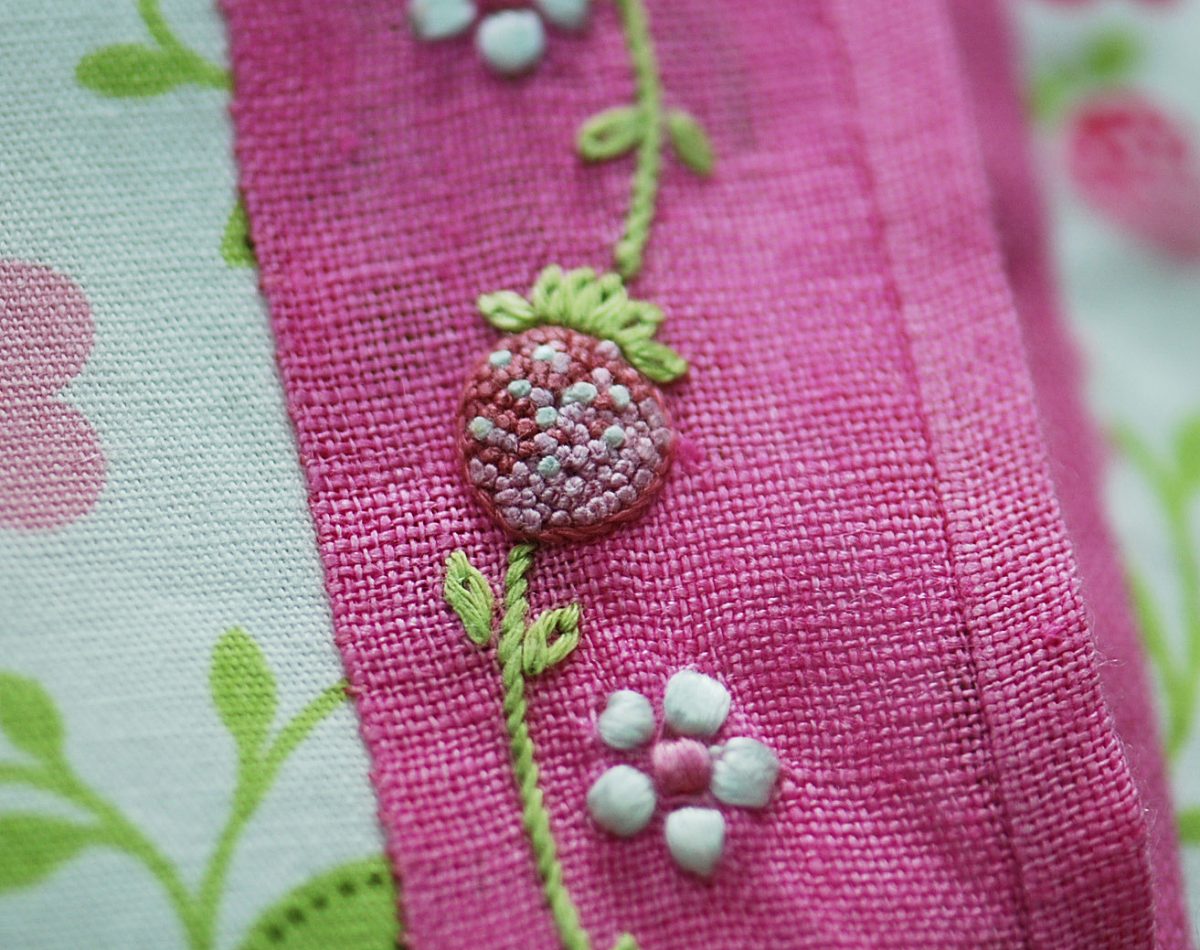
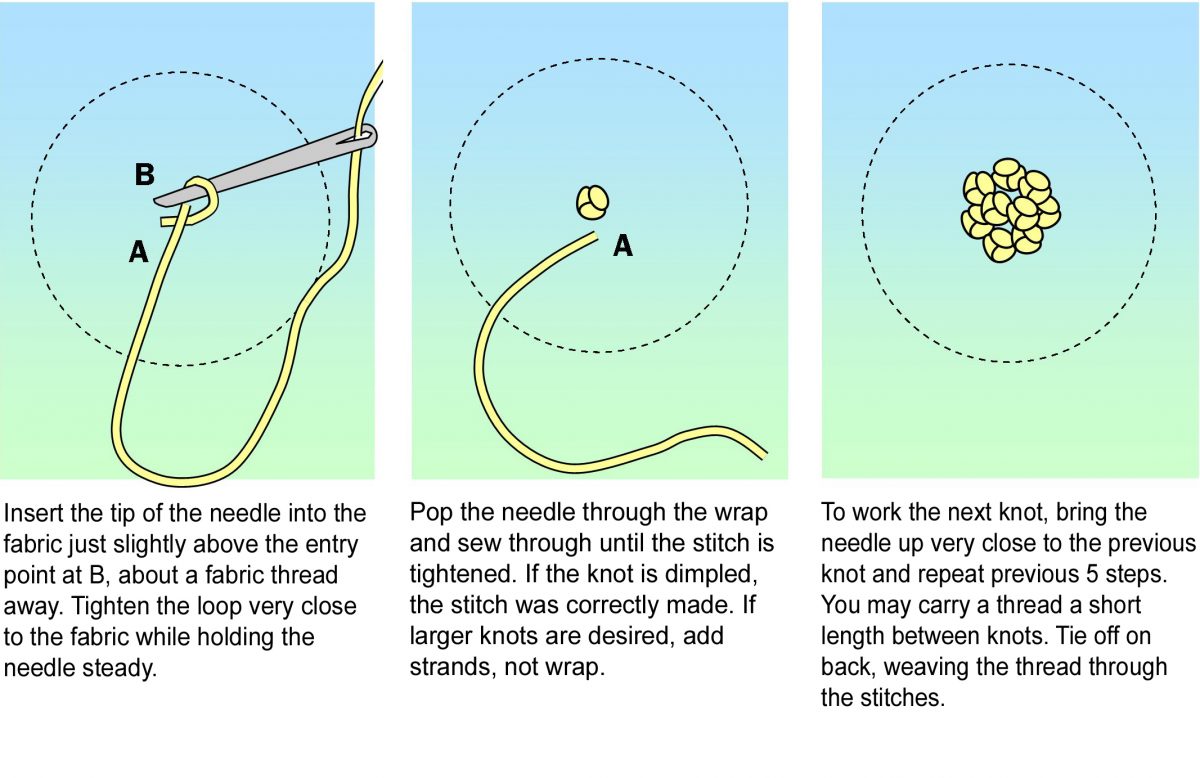
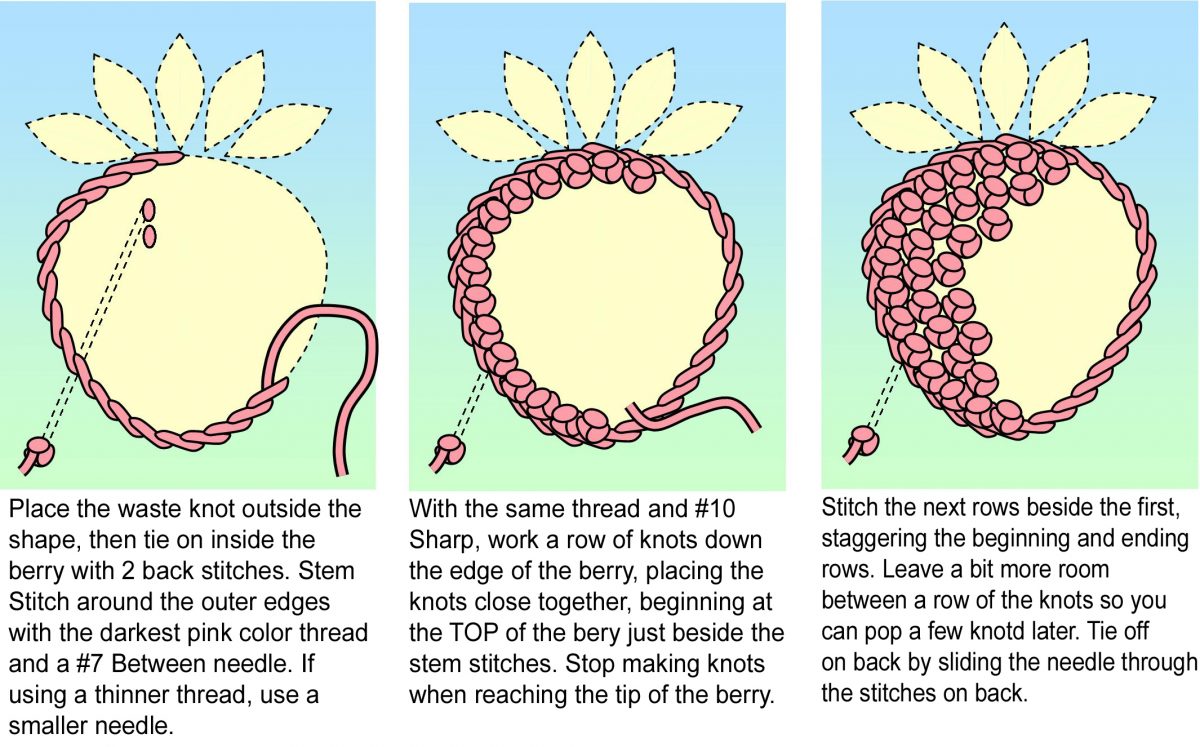
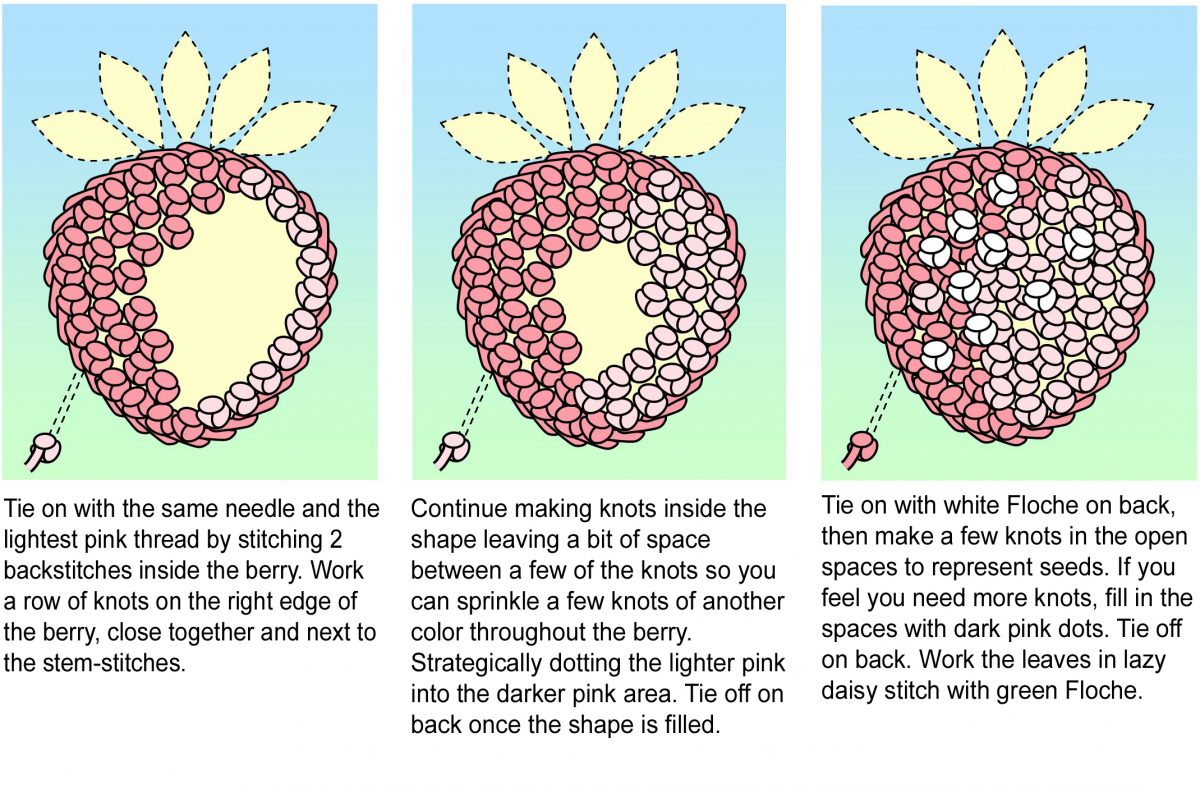
I’m often asked about my embroidered French Knot stitched clusters. Sometimes it’s difficult to recognize the stitch due to the fact that I make my stitches using only one thread, usually Floche (a luxury embroidery cotton), and with only one wrap over the needle. I always outline the area to be stitched with short stem stitches in the same color as the knots inside the area. The knots are purposely crammed together with only enough space to allow for the size of the knot. If possible, I avoid placing the knots in an aligned pattern, but instead choosing to place them randomly. The result is almost sculptural and quite interesting.
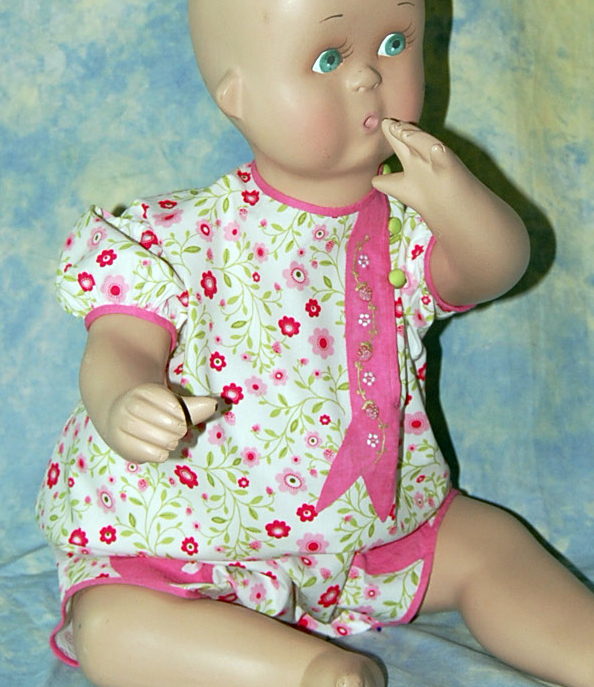
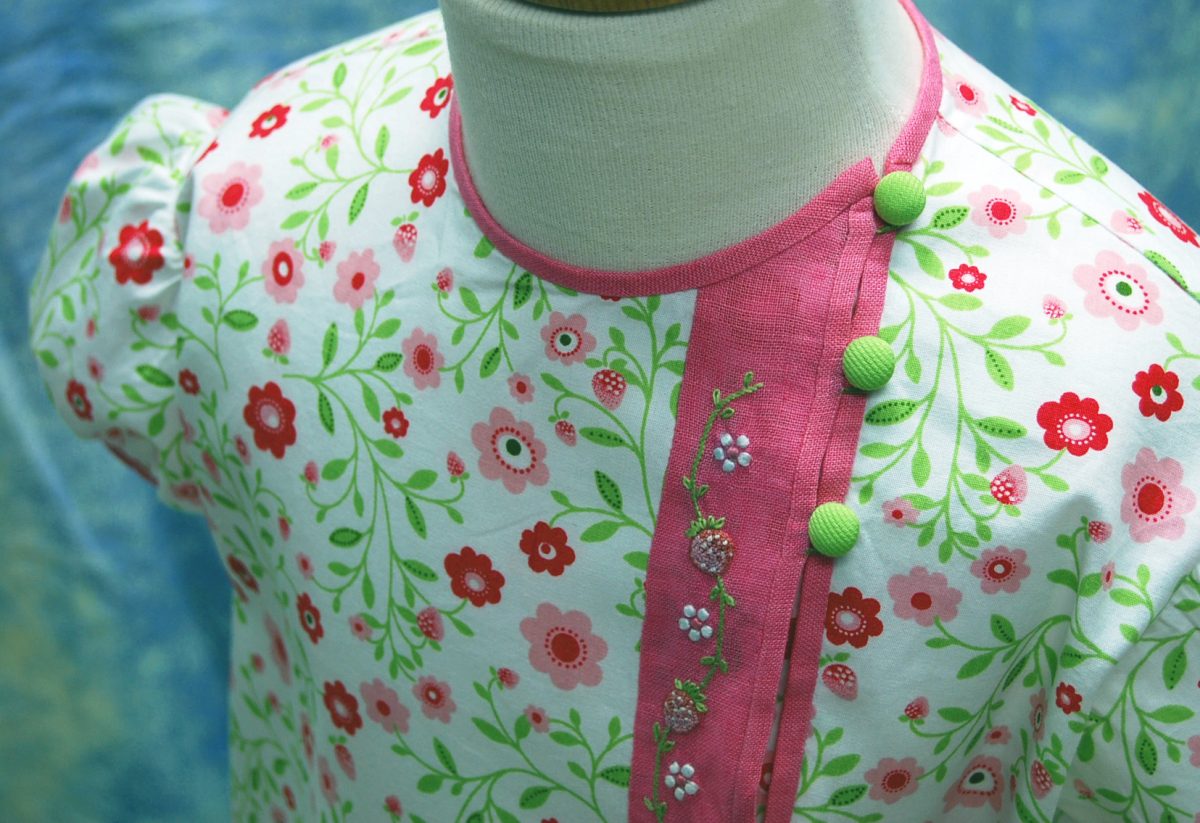
A very tight closeup of the stitched berry.The cute baby romper project was featured in Wendy’s Embroidery Club. The pattern is only available in Size 2.Shoulder detail showing actual size ratio of embroidery to garment.
If you are interested in obtaining a pattern for this project, please contact me at wendschoen@aol.com. The complete pattern and detailed handout costs $20 including shipping. Please reference Embroidery Club, Volume 7, Number 1, Passion Posies.
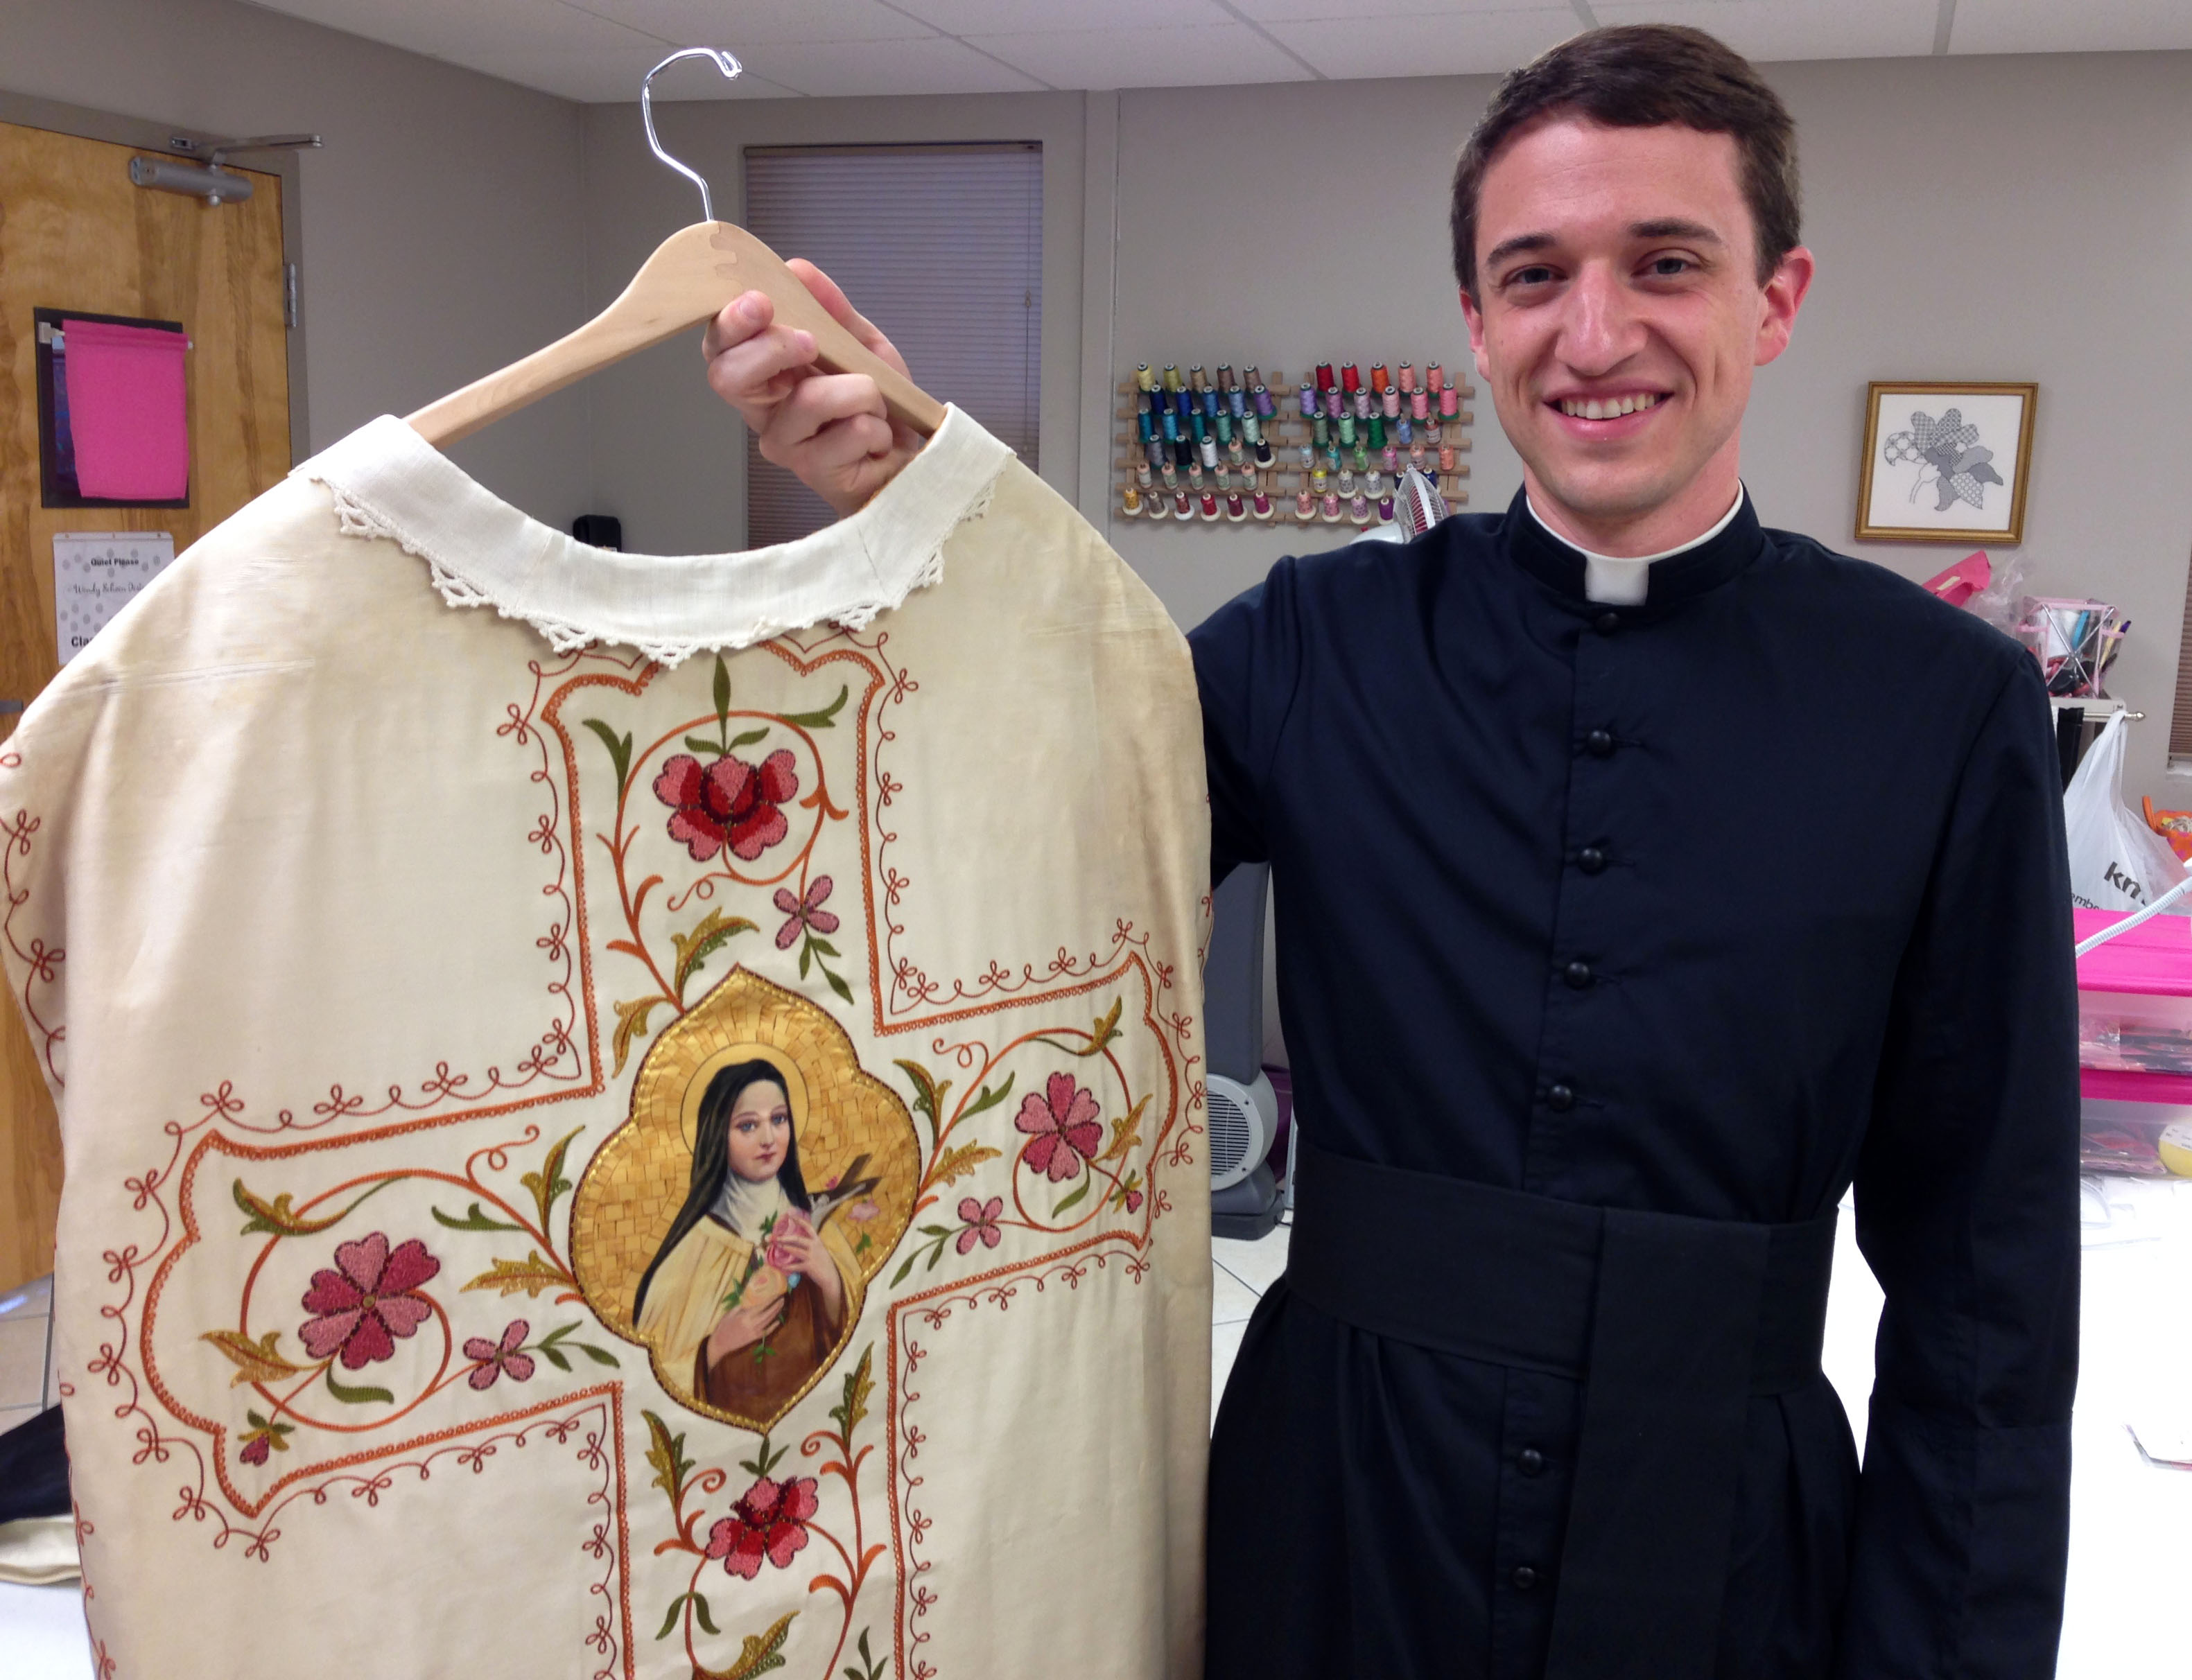
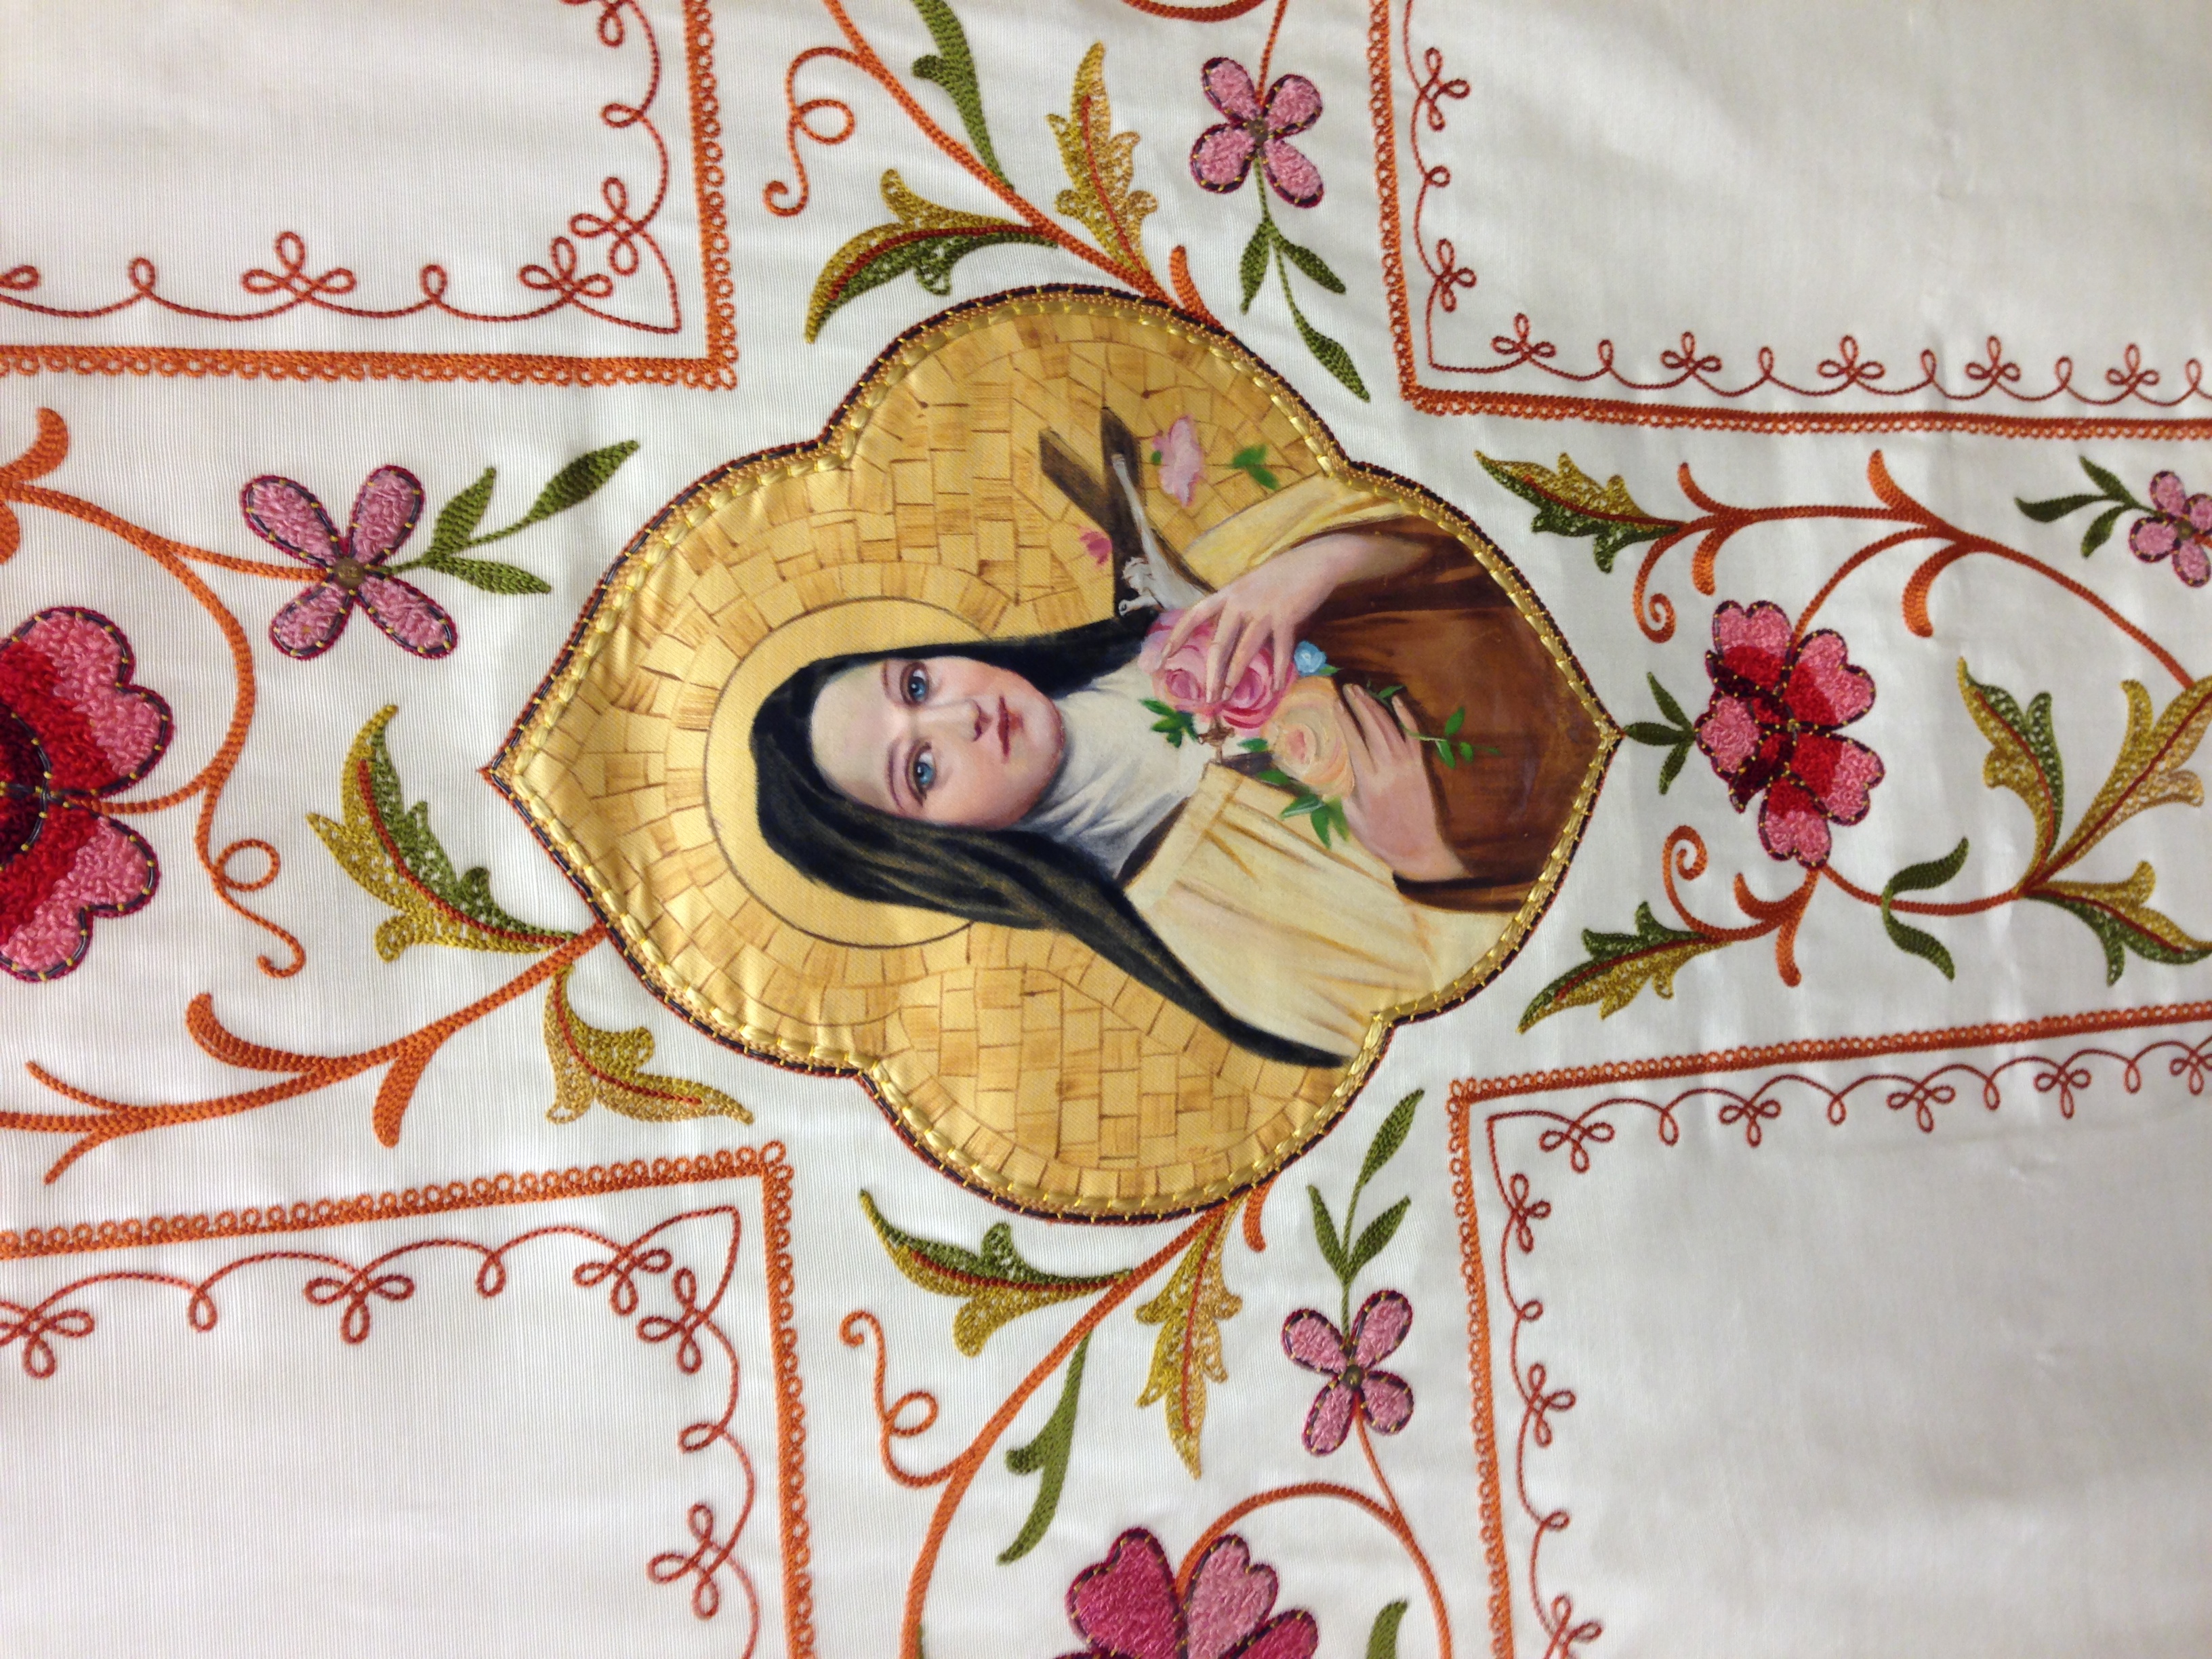
This gorgeous antique vestment was purchased by Fr. Garrett O’Brien sometime after his ordainment into the Catholic priesthood. The day I received Fr. Garrett’s phone call, I happened to be between projects and his request was quite unusual and interesting. I love a challenge so I was intrigued with the opportunity. He was seeking someone to recreate missing elements of his antique vestment, which he planned to gift another young priest at his ordainment the following year. He happened to be in the vicinity of my studio so I decided to meet with him at once. It would be the beginning of my friendship with a very young priest with very good taste in antique vestments.
Fr. Garett O’Brien with his antique hand embroidered vestment with thread painting and goldwork.The gorgeous hand embroidered and painted antique vestment of Fr. Garett O’Brien, which was restored by another source.
As it turned out, I was recommended to Fr. Garrett by someone from my church in downtown New Orleans. Word travels quickly in New Orleans, a place of undeniable heritage and intrigue. In other words, everybody knows everybody and I suspect he just happened to speak to the one person who knew of me. He was seeking someone to recreate the missing elements of the vestment ensemble for his friend and given I had almost a full year to complete it, I readily accepted the commission. At last, the opportunity to utilize the skills I learned while achieving a Certificate from the Royal School of Needlework in London.
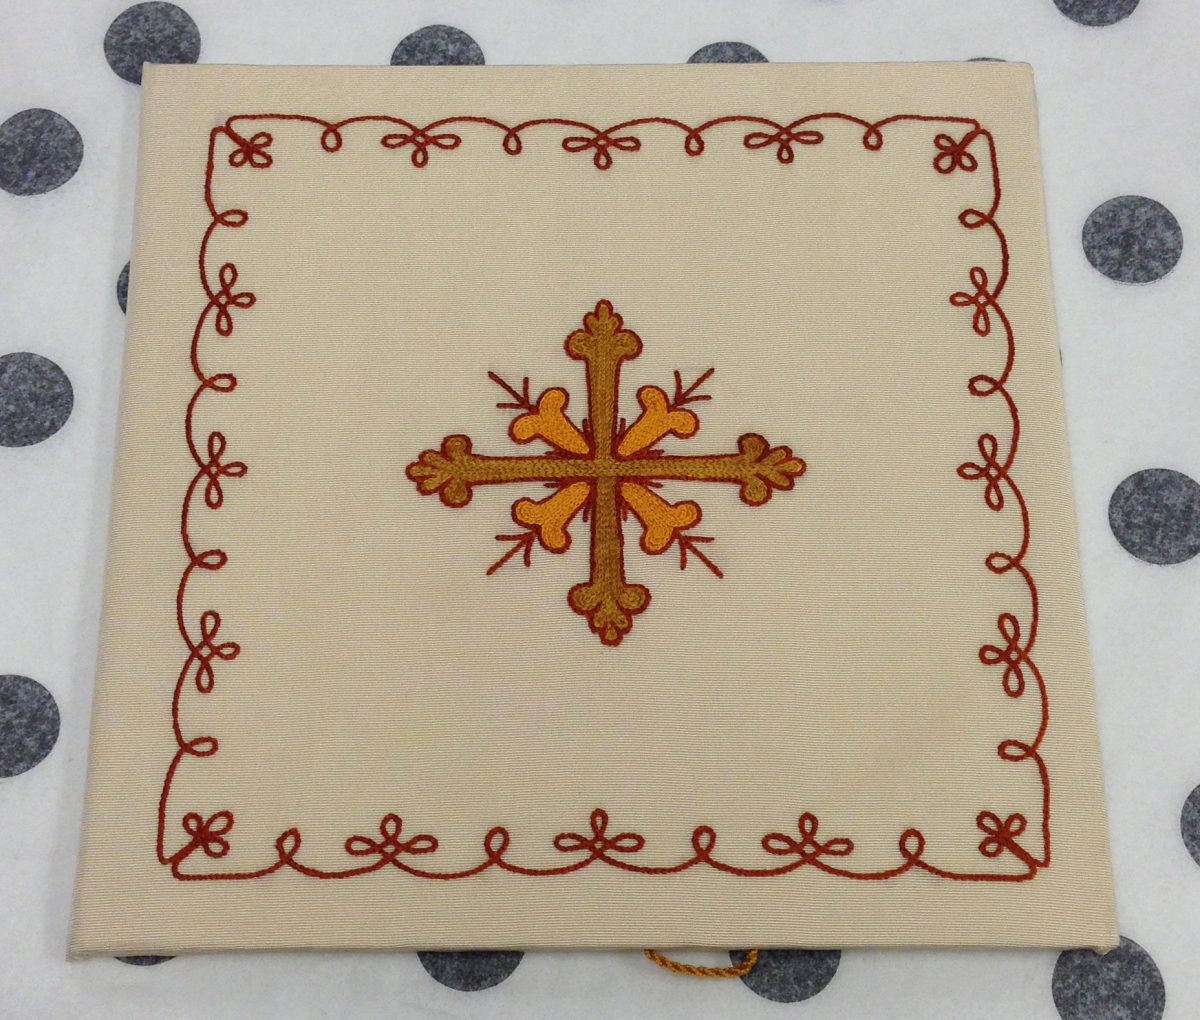
The elements he was missing was a burse, which purpose is to protect the hosts while in the chalice, and the shall, which is laid over the burse, much like a small square tablecloth. The design was taken from the piece that the priest drapes over his arm and was made to match the embroidery on the vestment. The embroidery was done in three colors and was stitched in Beauvais stitch, or chain stitch. The challenge was to find the appropriate fabric and the exact color threads so the reproduction pieces would match the originals to exacting specifications.
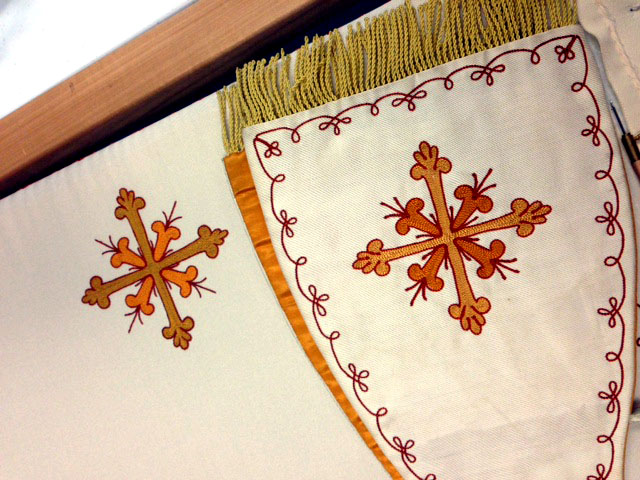
This photo is the completed burse with front and backs joined together at the side and held in place with a twisted cord holding thread. The embroidery is mounted on acid free card and lined with goldenrod colored silk fabric on the inside of the “book-like” accessory.
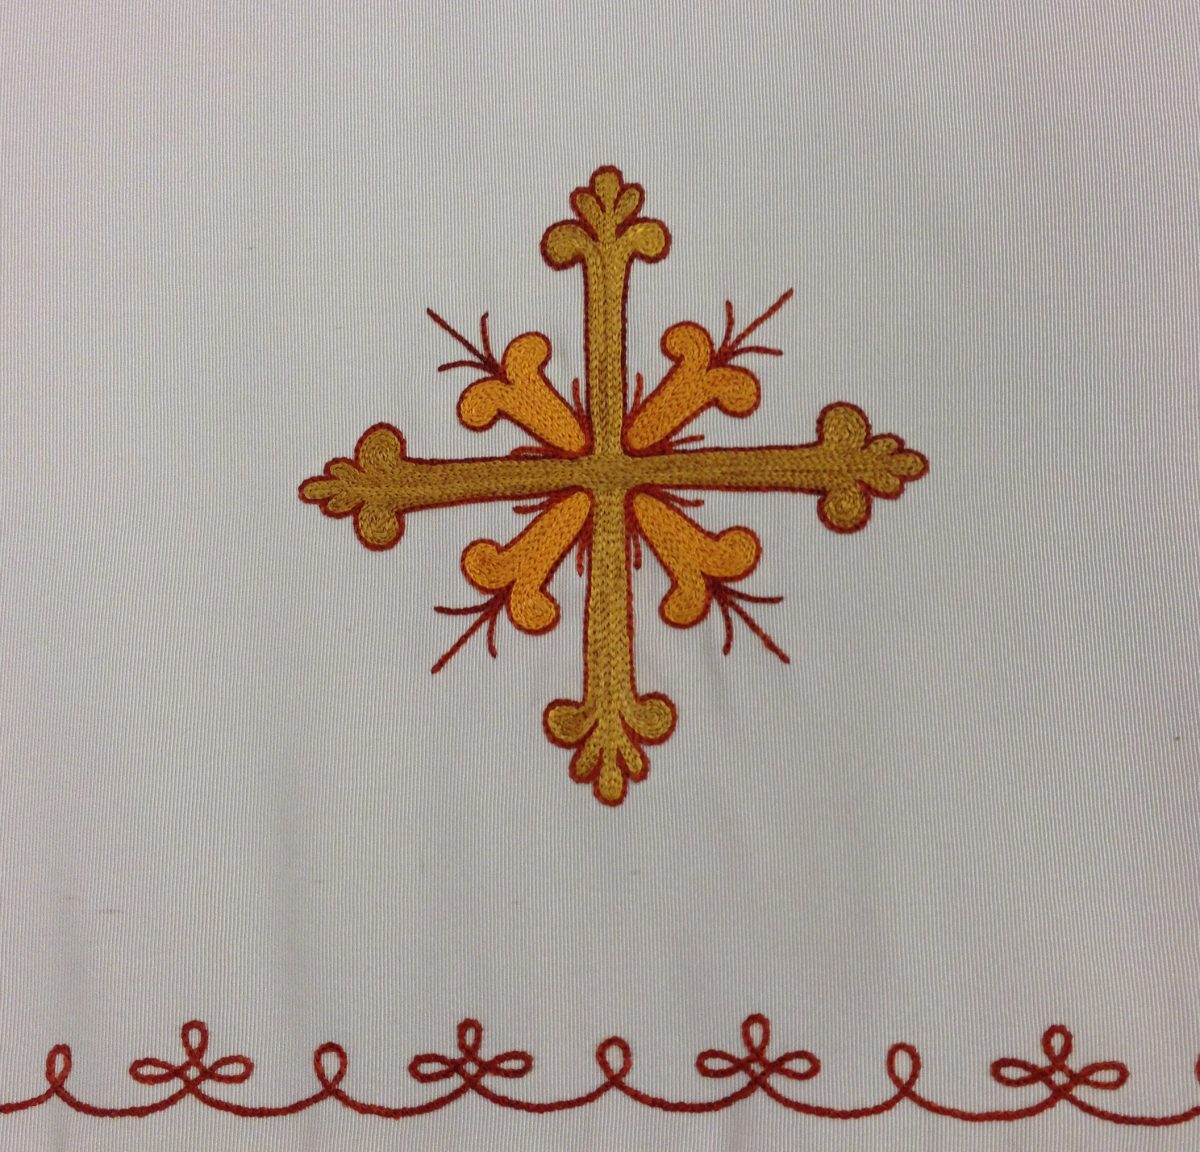
A tight close-up of the center of the burse showing the stitch pattern and looped border which frames the central figure.Here is the completed shall I reproduced placed beside the original antique sleeve drape which is lined with goldenrod silk and trimmed with bullion fringe.A close-up comparison of the arm drape and shall.
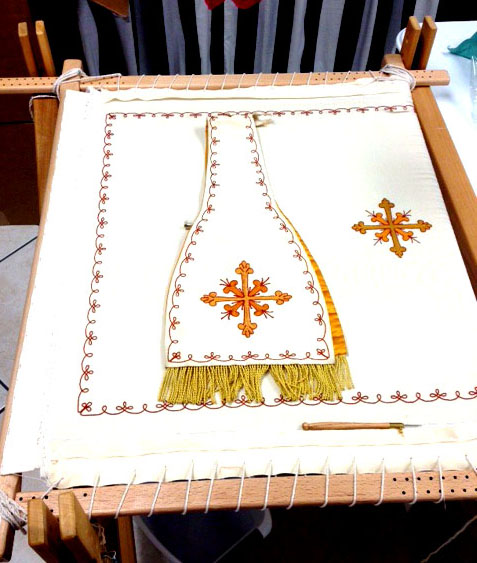
The fabric was easy to find, but imported faille is quite costly and most important to the work. Finding the thread proved much more difficult. It seemed there never was a thread made to match these three colors in shade, intensity, and weight. I finally decided to use silk thread, which matched the antique almost exactly. And I decided to use my slate frame and trestle stands rather than hoop. I determined to try my hand at Tambour stitching, which would have been the best application of this work, but that darn needle was tricky and I didn’t have time for the “learning curve” which was required to become proficient at the art. I settled on using a hand needle with a bit of bee’s wax to tame the fibers slightly and darken the color a bit for a more pleasing match.
I worked diligently on the project between other projects and teaching jobs and finally, it was done in time for the newly ordained priest and my friend, Fr. Garrett O’Brien.
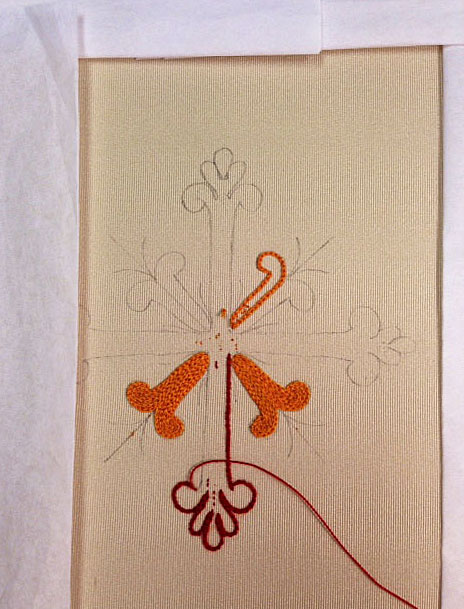
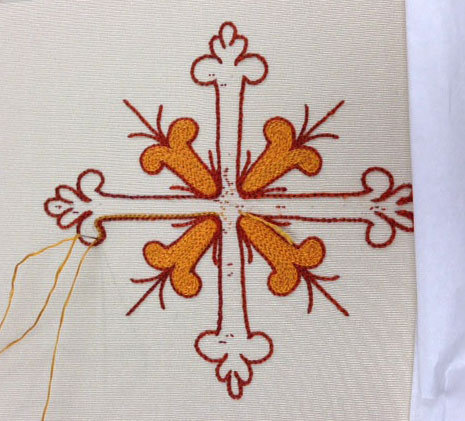
The design of the shall is transferred to the fabric with pounce and carefully painted with a fine brush and a steady hand. The lightest color areas were echo stitched first.The work in progress. The entire design is outlined in the darkest color using chain stitch.
If you have an antique garment you wish to have restored, please inquire via email. I am open to complying within your budgetary requirements. Please allow ample time to complete the project. wendschoen@aol.com
I have a small group of sewing buddies that visit me every Tuesday in my New Orleans Studio. We call this gathering “Stitch Therapy Tuesday”.
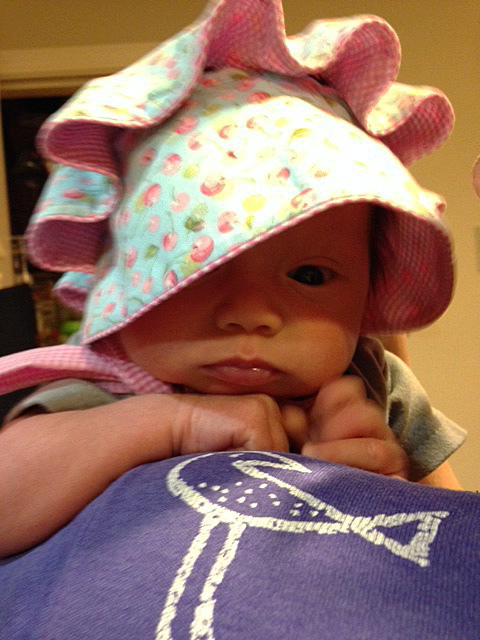
Margie made this seersucker bonnet for her precious granddaughter, Marin. Honestly, have you ever seen anything so cute?
This group consists of my Smocking Arts Guild members and a few others I’ve invited to join. It’s a lot of fun to discuss our projects and to encourage each other in our endeavors. Sometimes we work on UFO (un-finished objects) projects and other times we work on structured projects such as quilts and the drafting of patterns to handle fitting issues. I’m on hand to help with the technical stuff, but these ladies are so proficient at sewing, they actually help me with my projects.
Around 11:30 pm, we retreat to the kitchen and get lunch ready. We take turns making lunch and we truly enjoy our time together. Lately, the “regulars” have been contributing and bringing glorious concoctions of their own recipes and we delight in each other’s cooking expertise.
I decided to hold my first “Guinea Pig” class in order to test out the new bonnet pattern I was drafting, so I announced one day we would work on bonnets the following week. I really needed help and they truly came through for me. Each sewist chose a different fabric combination and size and the class was formed.
This little cutie is quite new to our group. It’s May’s first granddaughter, Kay looking spiffy in her new bonnet with gingham lining. So precious!
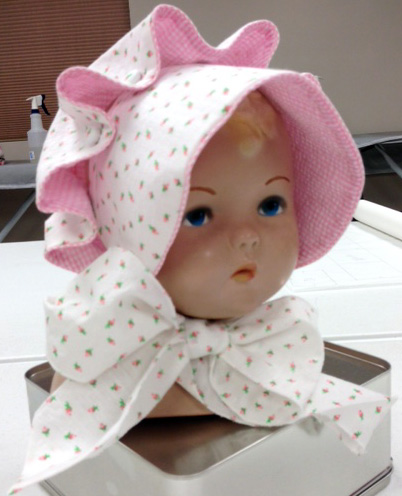
The Le Petite Enfant bonnet pattern, which was first published in 1996, was having a come-back and lots of folks had been requesting it in larger sizes. I couldn’t imagine why anyone would put a bonnet on an older child, but it was explained that it was perfect for the beach and the hot southern climate. After two years of requests, I decided to republish the pattern in larger sizes. It has been a huge hit and it has inspired me to design more Guinea Pig classes for my group.
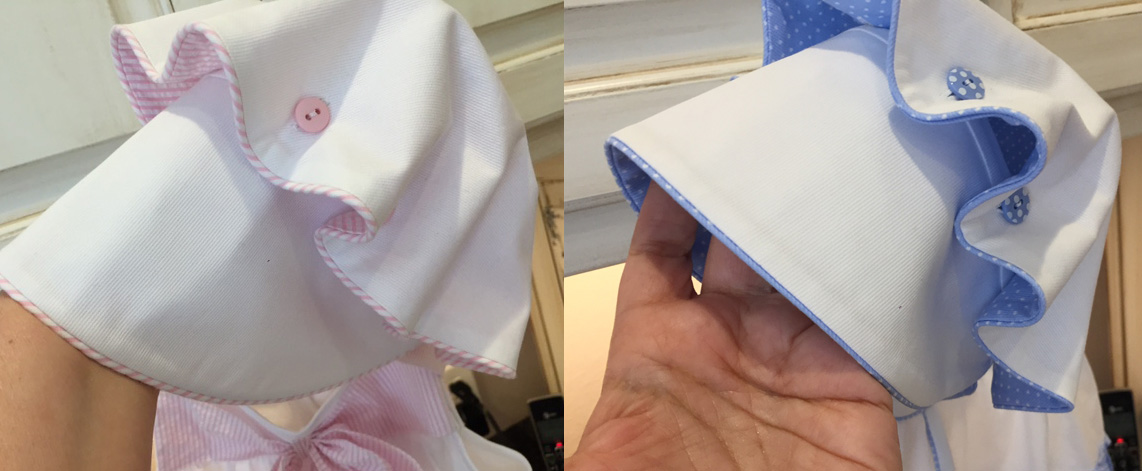
These little cuties were made by Suzette for her grandmother’s hope chest. Aren’t the color combinations adorable?This adorable rosebud and gingham bonnet was carefully piped around the edges with covered piping. Covered buttons complete the look.
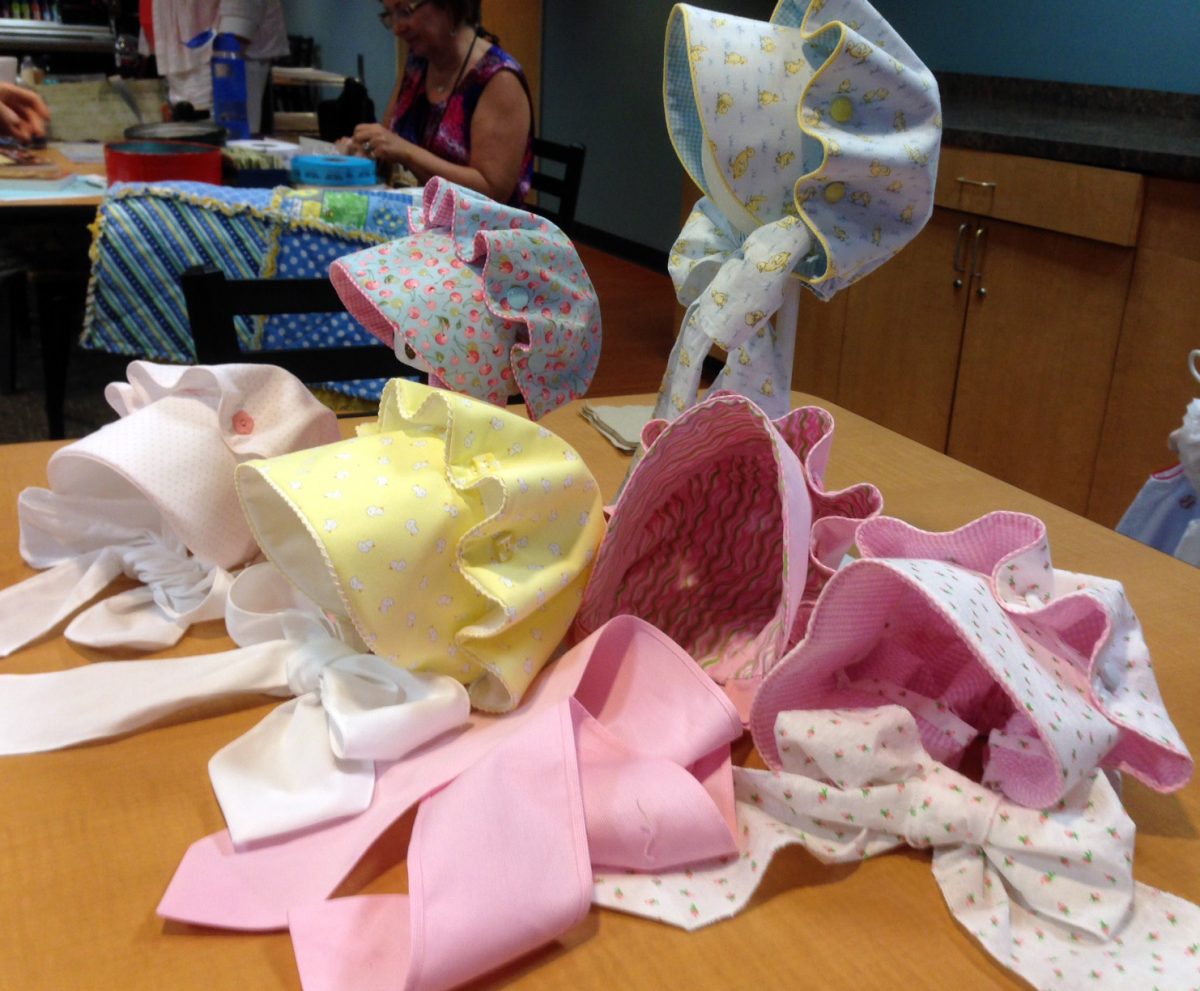
Results from the “Guinea Pig” class was amazing and I was thrilled to see how creative they had been with choice of fabric combinations and button choices. Every bonnet turned out adorably and I’d like to share the results with you.
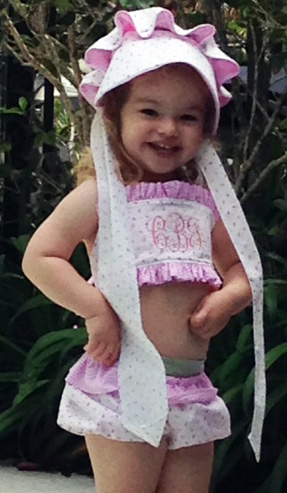
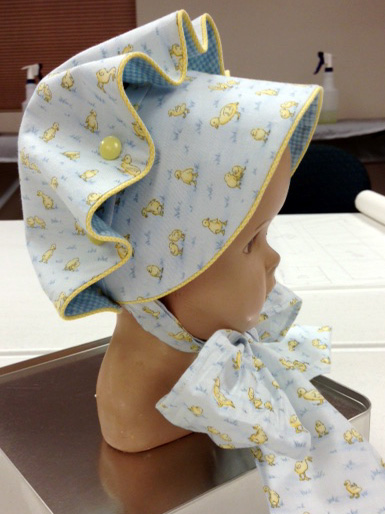
Here is a whole pile of bonnets ready for “show ‘n share” at our SAGA meeting. Each is cuter than the next.Jane’s adorable granddaughter, Caroline looks especially precious in her matching bonnet and bikini ensemble.Shirley made this adorable bonnet from duckie fabric and gingham lining. The piping is in contrast to the two fabrics.