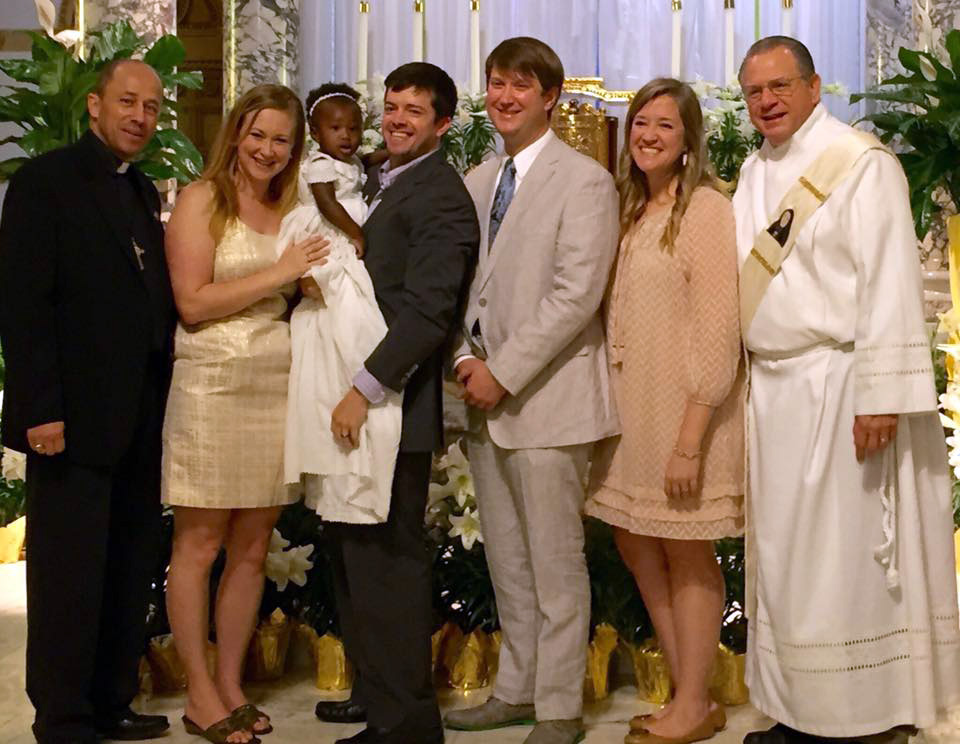
Recently, my adult niece asked me to fix a rip in her husband’s family christening gown in preparation for the christening of her daughter, Norah. Norah was adopted so it was necessary to wait until paperwork was finalized before her baptismal and as a result, was almost a year old and had grown larger than the gown could accommodate. I asked to evaluate the gown before proceeding.
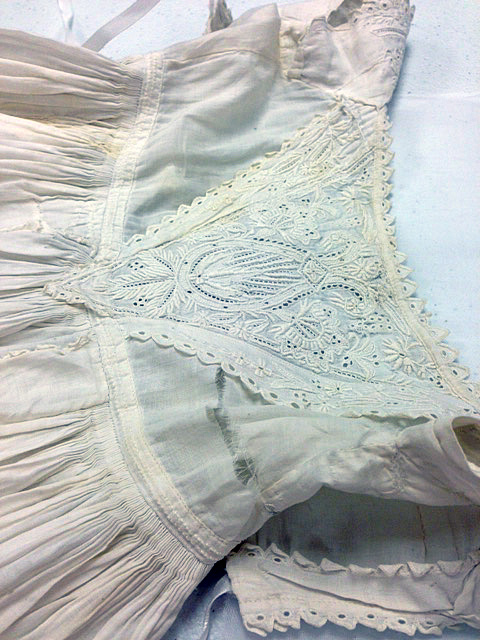
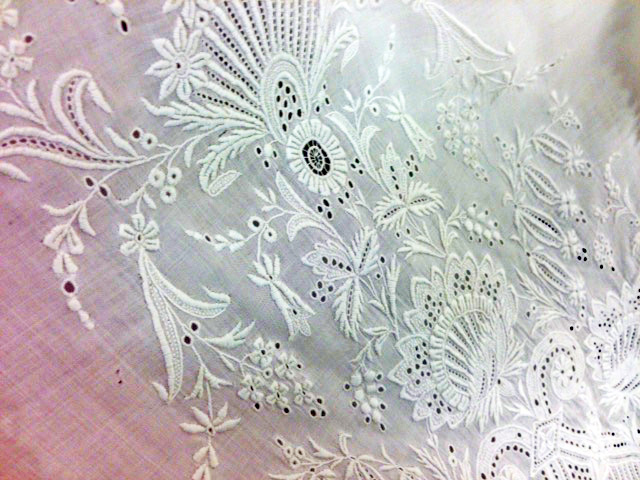
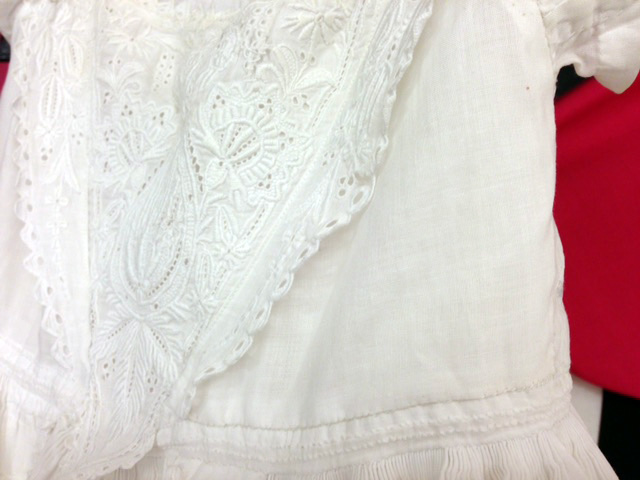
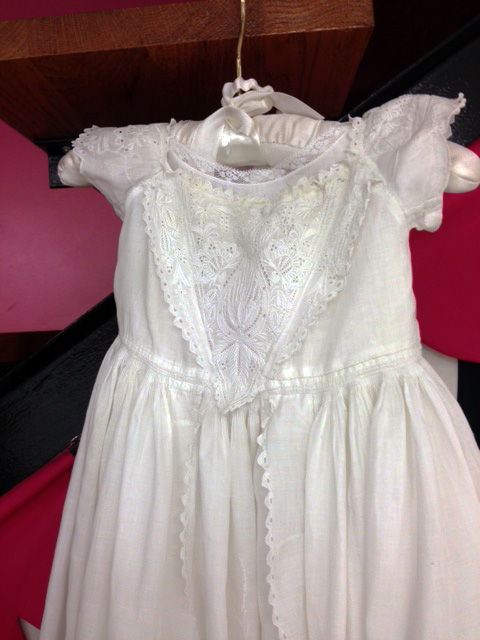
I have restored many gowns over the years and most are quite simplistic designs with minimal repairs, but I wasn’t prepared for what I encountered. To my complete shock and utter pleasure, I saw one of the most beautiful Ayrshire gowns, made entirely by hand with perfectly spaced French gathered pleats and exquisite embroidery which included both the traditional “wings” and the “gender point” at the front of the sweet yoke. The side edging along the yoke is referred to as a “wing”, which not all gowns possess and the tiny point at the lower edge of the yoke is referred to as the “gender point,” essentially because it was tucked inside in the event of a baby girl christening and revealed in the event of a boy’s. Most gowns from the mid 19th Century, but certainly not all, and I can date the gown based on the style of the yoke and length of the sleeves. The embroidery style includes needle lace filling stitches which confirm genuine Ayrshire authenticity.

Most of the restoration projects I take on consist of small lace tears or the addition of an embroidered date to be applied on the slip, but this was a serious project consisting of multiple bug holes, rips, non-professional “repairs” and many stains and rips. My heart almost sank. Because of the age of the child to be christened and the condition of the gown, it was further damaged by merely trying the gown on for size. Aged stains were stitched together so they would be concealed within the pleats, large holes were crudely patched with completely different fabric and the gown was held together with two inexpensive ribbon ties, taking the place of the customary drawstring ties around the neck and yoke bottom. I was given two weeks to complete the project. I also needed to create a matching slip. Instead of a bonnet, it was decided a headband was preferred. Did I mention I had two weeks to complete this miracle?
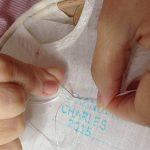
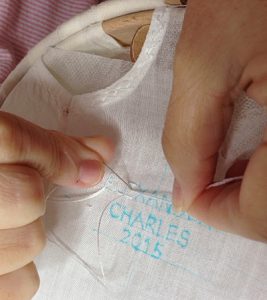
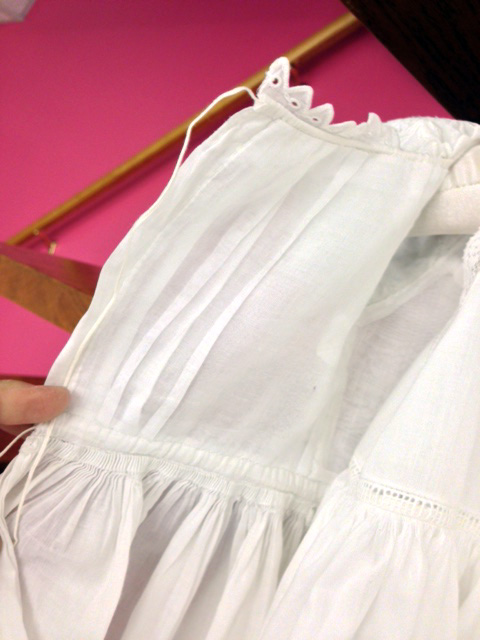
First things first. I began by replacing the torn panel. Luckily I have a vast collection of antique garments. I chose a day gown with similar fabric I could sacrifice for this project. Using medical examining table paper, I made a template transfer of the area to be replaced. First, I hand basted the “patch” fabric onto the right side of the damaged panel. Luckily the fabric matched perfectly. Then, I cut panels of cotton organdy for the yoke front and reinforced the inside of the front bodice. On the back bodice, I removed the craft store type ribbon ties and rethreaded the neckline and waistline with vintage soutache braid ties. Whoever added the ribbon ties, folded under about one-half inches of fabric at center back so I let those stitches out and added one full inch of desperately needed width to the bodice. Whilst inserting the braid ties, I managed to tear the hand stitched edging along the neckline so now I had to repair the damage I caused to the edging in front. Ughhhh! Focus, Wendy, focus.

I then reinforced the inside of the yoke with organdy and blind-stitched it in place. I patched bug holes with tiny strips of fusible interfacing fused to the wrong side. The sleeves had been crudely repaired the same way but attached via sewing machine. I removed that and replaced the underlining with organdy. It was beginning to take shape but due to lack of time, I decided to wait on underlining the skirt.
Now with only a few days remaining and feeling gutsy, I decided to take on cleaning the gray discolored gown with lots of spittle stains. I soaked it for three full days in the best detergent ever made, Delicare liquid made by Arm and Hammer. I will warn you in advance; this is impossible to find but I have found it on Amazon and speaking directly to the manufacturer, was given permission to purchase it wholesale by the case. If enough of you wish to purchase it, I will definitely order it. Check your local grocer first. Sometimes they will special order it for you.
The gown turned out amazingly clean and even the saliva stains disappeared so I released the pleated areas which hid them, effectively yet not professionally. Although I wasn’t able to attend the ceremony, Norah looked absolutely adorable in her finery and my niece and nephew were so pleased with the outcome and the day was completely a blessing for a little girl who was given a family who couldn’t adore her more.